A classic Autogate remote control consist of only two buttons which is – open one side or open both sides. A two channel function sufficient to satisfy the needs for home convenience. However, in recent years, a rise in demand for a four-channel Autogate system was observed in Malaysia. That said, DNOR Turbo 880 Autogate system was designed with the purpose the meet the rising demands and provide a comfortable lifestyle for all fellow Malaysian citizens. What are the functions for DNOR 4-channel Autogate Remote Control? Or how to duplicate with newly bought remote controls? Let’s delve deeper.
Functions of Turbo 880 Auto gate Remote Control
The fundamental functions of the four-channel Autogate system remain consistent, providing users with the ability to operate the gate with ease and flexibility. These core functionalities include the option to open or close the left gate independently, open or close the right gate independently, or simultaneously open or close both sides of the gate. Beyond these standard features, DNOR enhances the system by incorporating an advanced safety mechanism. This additional feature, known as the panic alarm, is designed to prioritize user safety, offering an extra layer of security in emergency situations.
Another notable hidden feature of the Turbo 880 Autogate system is the ability to arm or disarm the infrared sensor, also referred to as the photobeam sensor. This advanced component offers three significant benefits that contribute to both security and convenience for homeowners. First, it serves as an intruder alarm, detecting unauthorized access and providing an immediate alert to enhance home security. Second, it supports a safety auto-reverse function, which prevents the gate from closing if an obstacle is detected, ensuring the safety of people, pets, and vehicles. Finally, it includes an auto-closer timer that automates the gate’s closing process, adding an extra layer of convenience for daily use.
With this feature, homeowners can experience the dual advantages of enhanced protection and effortless operation. Importantly, the photobeam sensor is provided as a complimentary add-on for the Turbo 880 Autogate system, making it an attractive and valuable inclusion. However, even without activating the photobeam sensor, users can still benefit from the robust security features offered by the panic alarm function, ensuring peace of mind in any scenario. This combination of features underscores the system’s commitment to providing a comprehensive and user-friendly security solution for modern homes.
Guide for Turbo 880 Auto gate Remote Control basic functions

To open/close left gate, press the blue button on the upper left.
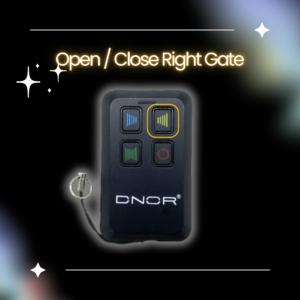
To open/close right gate, press the yellow button on the upper right.
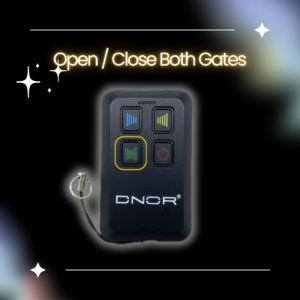
To open/close both sides, press the green button on the lower left.
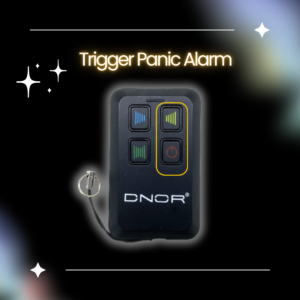
To Trigger Panic Alarm, press the yellow button (upper right side) and red button (lower right side) simultaneously.
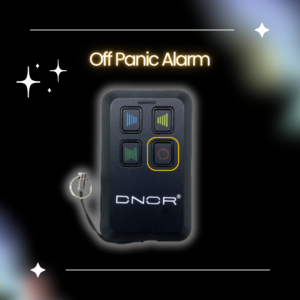
To disarm Panic Alarm, press red button.
Guide for Turbo 880 Auto gate Remote Control advanced functions
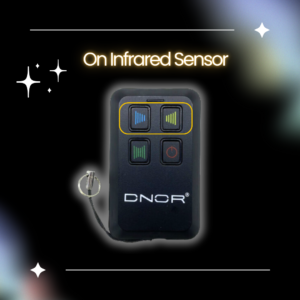
To arm/disarm Safety Infrared Sensor, press the blue and yellow button simultaneously. An audible beep sound can be heard as an indicator of the function in use. (only for customers with Photobeam Sensor add-on*)
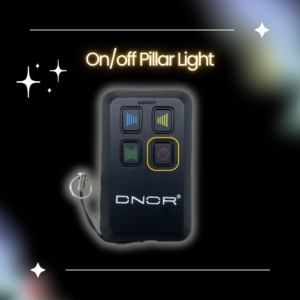
To turn on/off pillar light, press the red button. (Function set upon request with installer during installation process*)
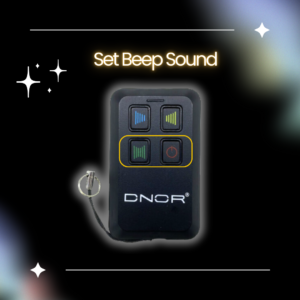
To set beep sound, press green button and red button simultaneously. This will trigger beep sound during opening and closing of Autogate.
Guide for Turbo 880 Auto gate Keypad basic function

To open/close left gate, press the blue button on the upper left.
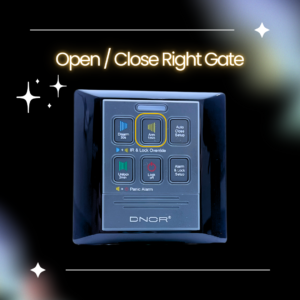
To open/close right gate, press the yellow button on the upper right.
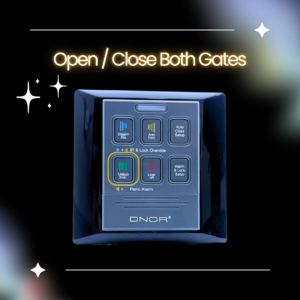
To open/close both sides, press the green button on the lower left.

To Trigger Panic Alarm, press the yellow button (upper right side) and red button (lower right side) simultaneously.
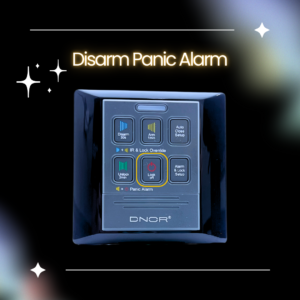
To disarm Panic Alarm, press red button
Till this point, it is exactly the same as remote control.
Guide for Turbo 880 Auto gate Keypad basic function
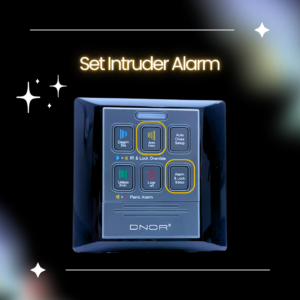
To arm Intruder Alarm, press the yellow button and ‘alarm & lock setup’ button.

To disarm Intruder Alarm, press the blue button and ‘alarm & lock setup’ button.
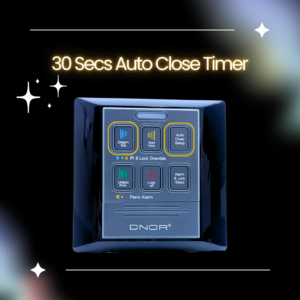
To set 30 seconds Auto close Timer, press the blue button and ‘auto close setup’ button.
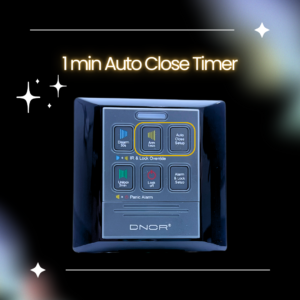
To set 1 minute Auto Close Timer, press the yellow button and ‘auto close setup’ button.
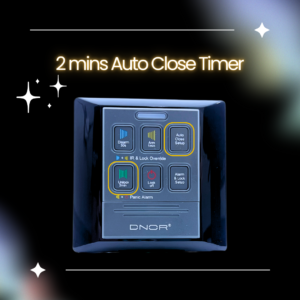
To set 2 minutes Auto Close Timer, press the green button and ‘auto close setup’ button.
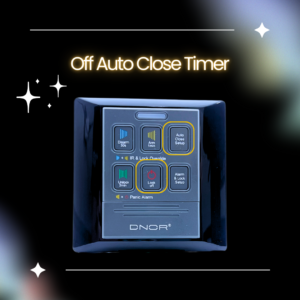
To Off Auto Close Timer feature, press the red button and ‘auto close setup’ button.
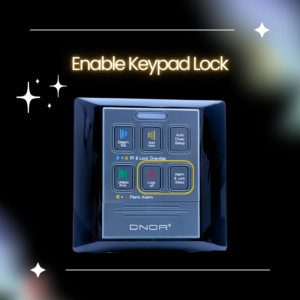
To enable keypad lock, press the red button and ‘alarm & lock setup’ button.
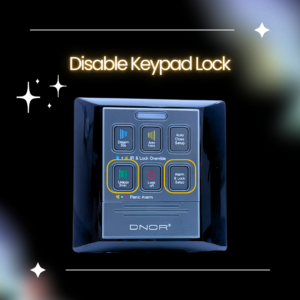
To disable keypad lock, press the green button and ‘alarm & lock setup’ button.
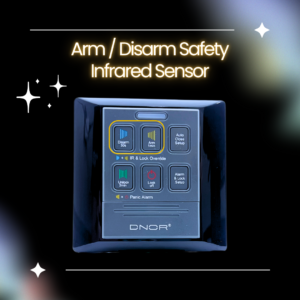
To arm/disarm Safety Infrared Sensor, press the blue and yellow button simultaneously. An audible beep sound can be heard as an indicator of the function in use. (only for customers with Photobeam Sensor add-on*)
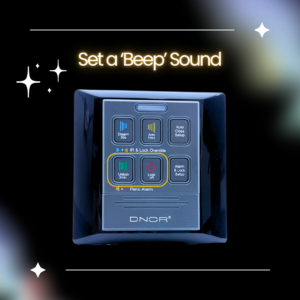
To set beep sound, press green button and red button simultaneously. This will trigger beep sound during opening and closing of Autogate.
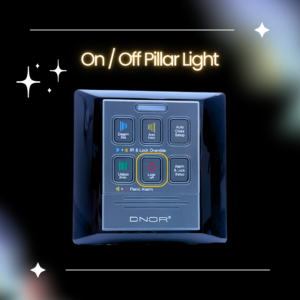
To turn on/off pillar light, press the red button. (Function set upon request with installer during installation process*)
Conclusion
While typical Autogates offer opening and closing functions, DNOR pushes the boundaries and offers a variety of features set to enhance household security and convenience. If any issue, please reach out to our customer support for assistance.


